Create a Learn.UQ banner (Original)
Staff can choose to either generate a simple UQ branded banner using the banner creation tool which is detailed in this guide OR select a custom image through Adobe Stock Photos and resize it to the required dimensions. For step-by-step instructions on selecting an Adobe Stock image, refer to the Add a Learn.UQ banner guide.
- Go to https://tools.itali.uq.edu.au/banner.
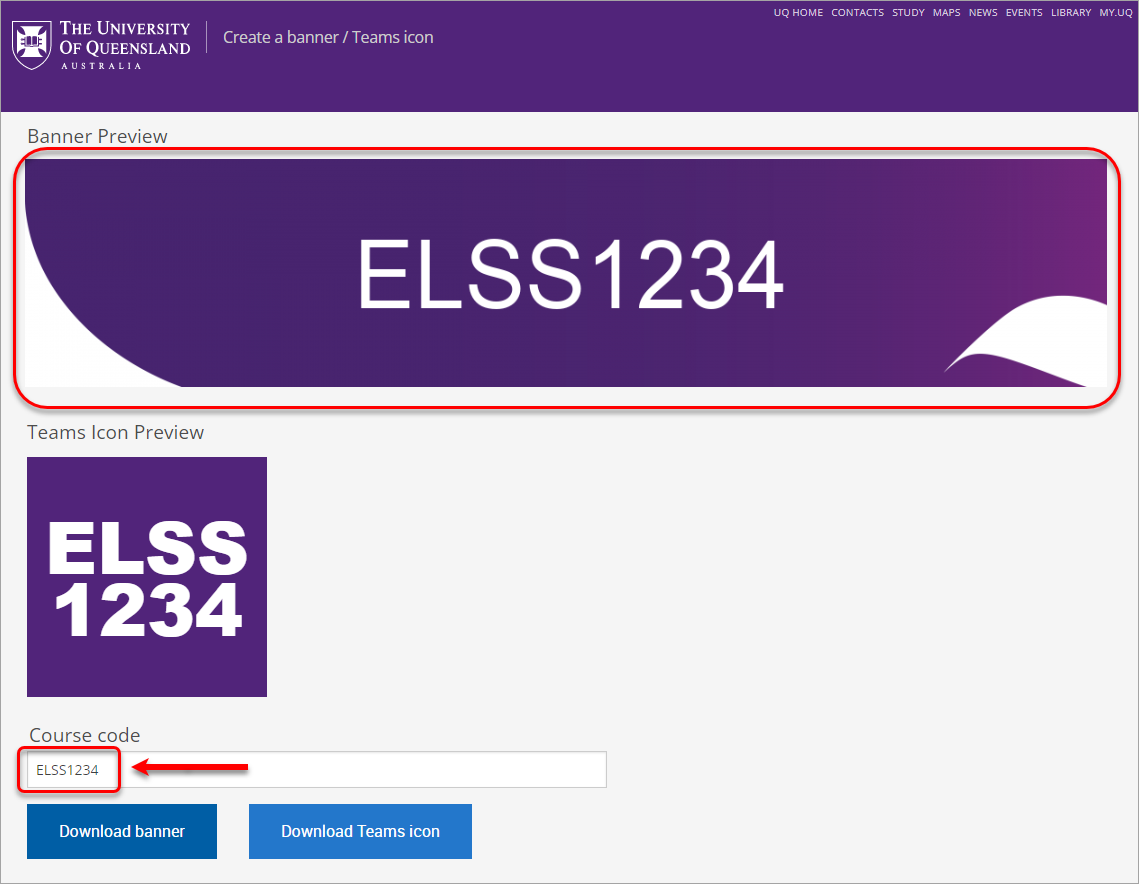
- Enter the course code in the Course code textbox.
Note: If you have a dual-badged course, enter both course codes with a space between them (e.g. PSYC1050 PSYC7050) and each course code will appear on a different line.
- A preview of the banner will then be generated.
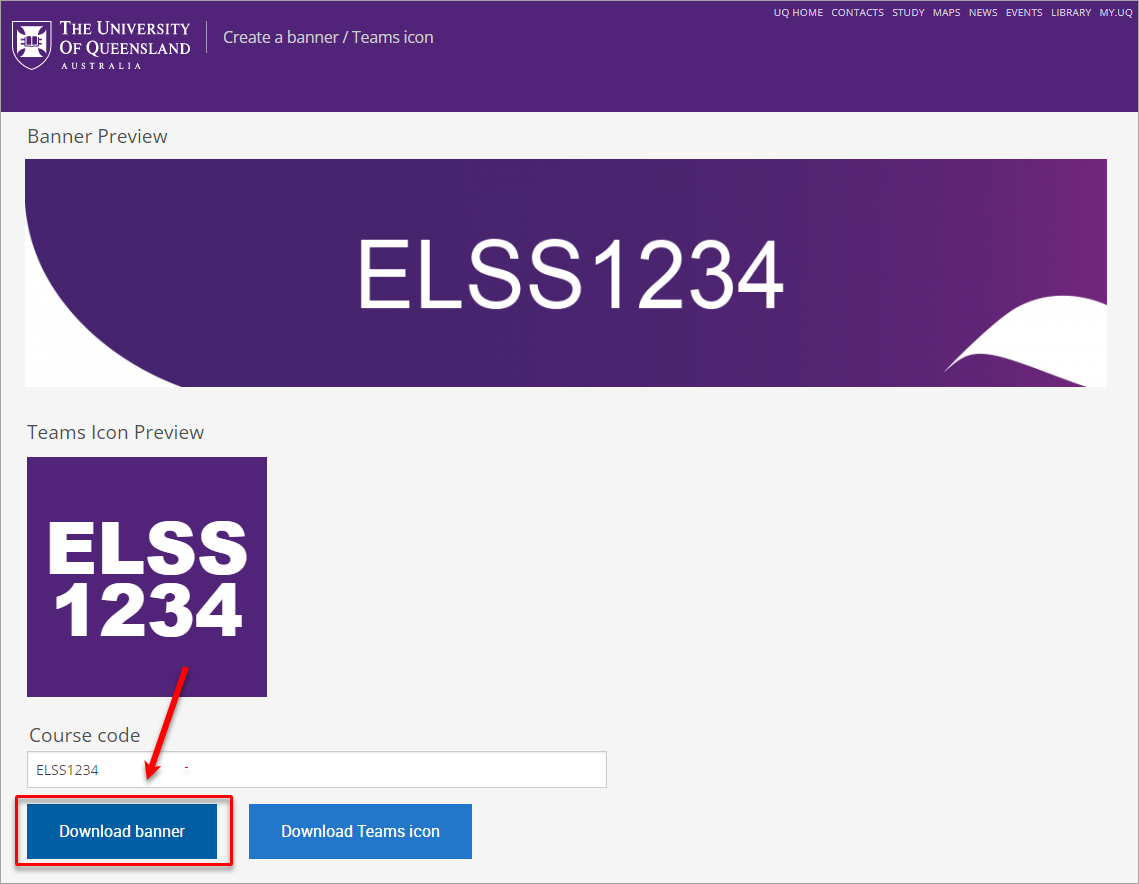
- Click on the Download banner button to download the banner for your Learn.UQ course. For step-by-step instructions on how to add the banner image to your Learn.UQ course, refer to the Add a Learn.UQ banner guide.
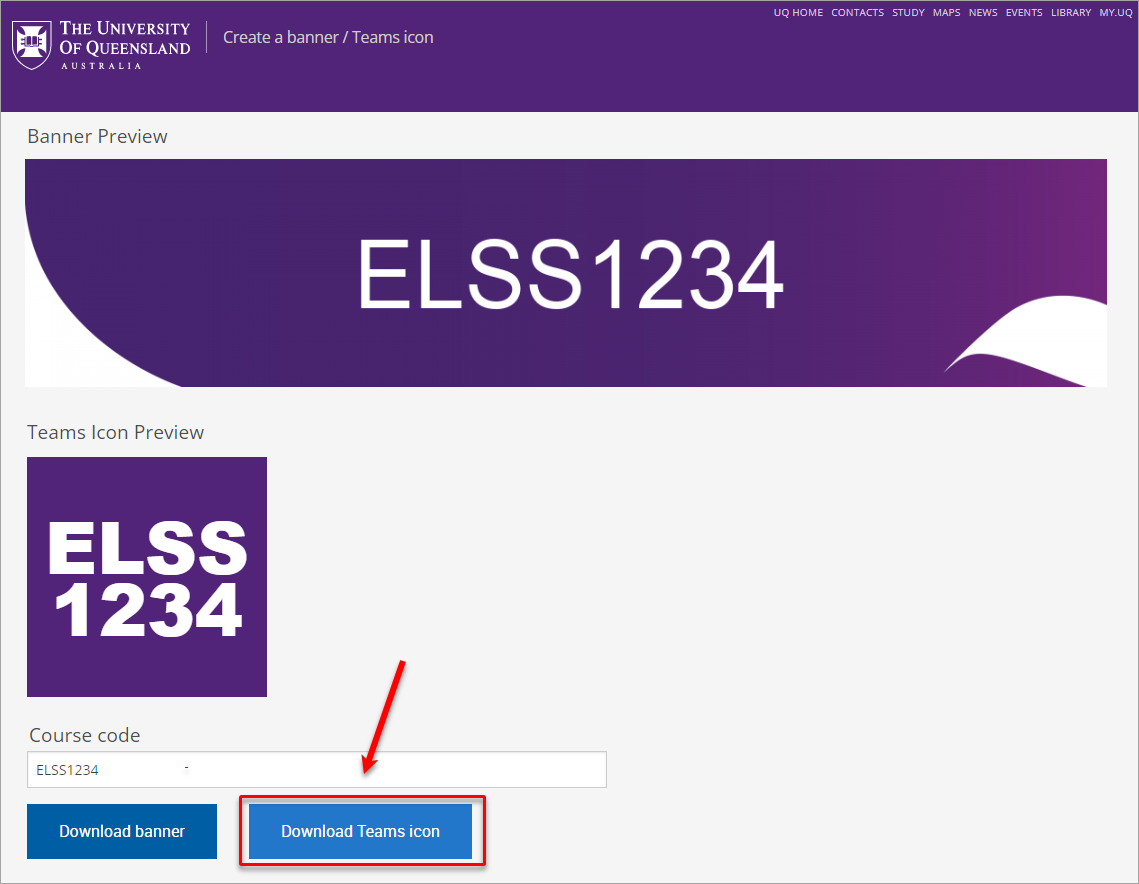
- Optionally, click on the Download Teams icon button to download the icon for your Microsoft Team. For step-by-step instructions on how to upload the icon to your Microsoft Team, refer to the Create a UQ Teams icon guide.