Groups (Original)
What are Groups?
The Group tool allows you to collaborate with fellow group members on tasks, projects and assignments. Groups can be assigned tools such as emails, discussion boards, blogs, journals, wikis, file exchange areas and task lists. Your Course Coordinator may set up groups to facilitate the submission of group assignments using the Blackboard assignment tool (not Turnitin).
There are multiple ways you can be allocated to a group:
- You can sign up to groups created by your Course Coordinator.
- Your Course Coordinator may have created and allocated you to a group.
- You can create your own group (only if instructed to do so by your Course Coordinator).
Sign up to a Group
Check the instructions given by your Course Coordinator carefully to ensure you sign up to the correct group. For example, you may be required to sign up to particular groups assigned to your tutorial group.
Warning: Once you sign up to a group, only your Course Coordinator will be able to change your group.
- Access your Learn.UQ course.
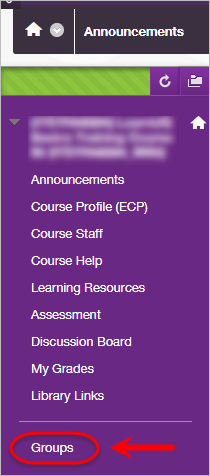
- Click on Groups in the course menu.
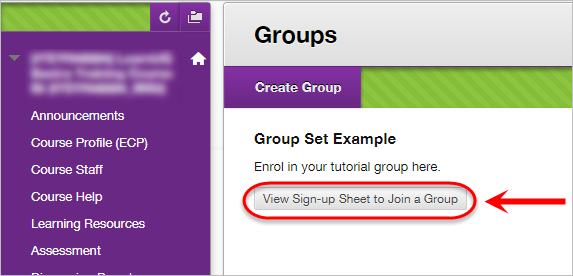
- Click on the View Sign-up Sheet to Join a Group button.
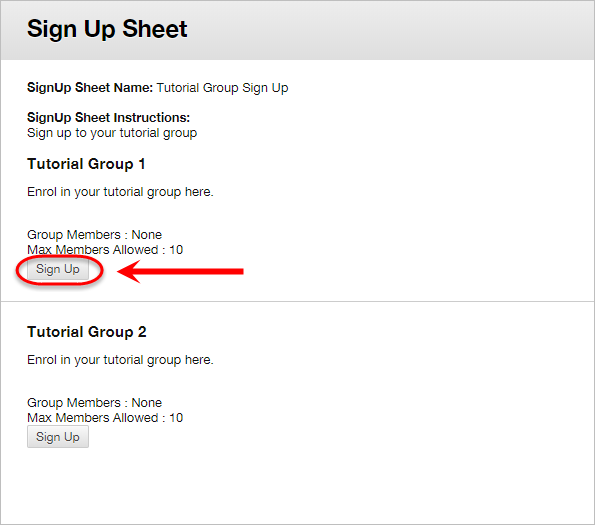
- Click on the Sign Up button for the group you wish to join.
- You will then be able to view the group information.
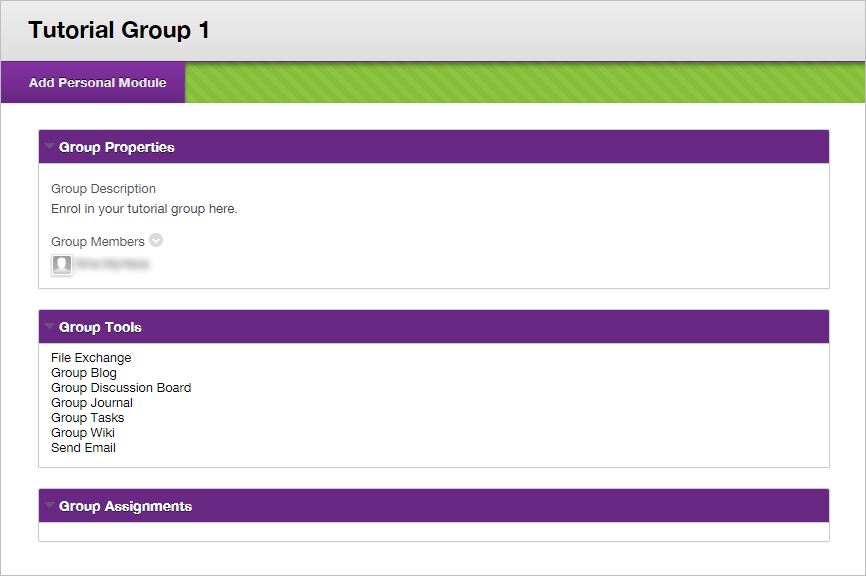
Access an allocated Group
Your Course Coordinator may have previously created and assigned you to a group that you can access in your Learn.UQ course.
- Access your Learn.UQ course.
- Your group is displayed under My Groups in the course menu.
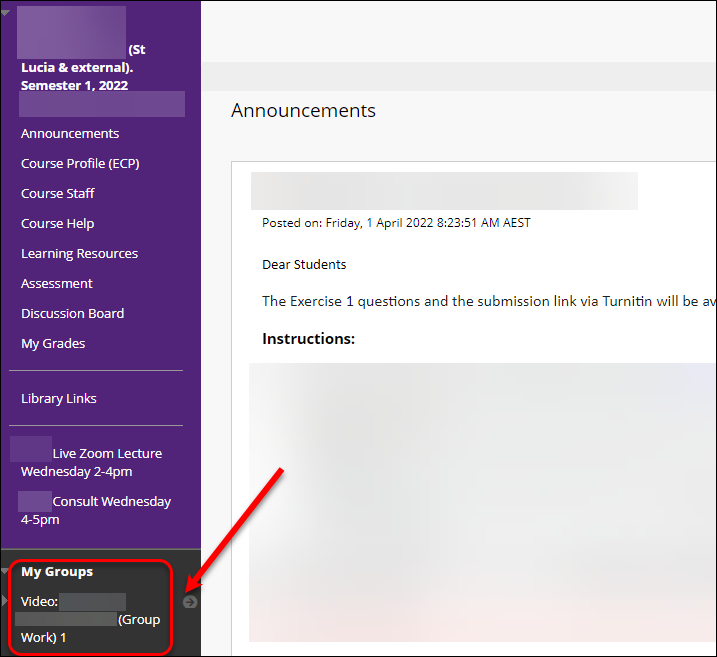
You also have access to other group tools:
- Access your Learn.UQ course.
- Click on My Groups in the course menu to expand the dropdown menu.
- Click on the name of your group to expand the dropdown.
- The tools that are available to your group will be shown.
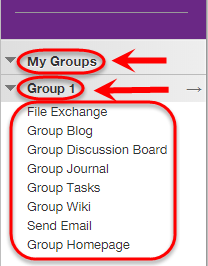
Create and edit a Group
Warning: Ensure your Course Coordinator has instructed you to create your own group.
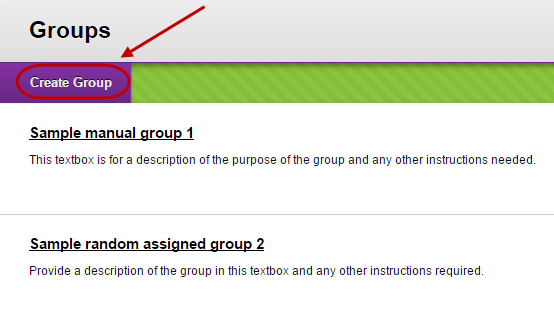
- Click on the Create a group link in the course menu.
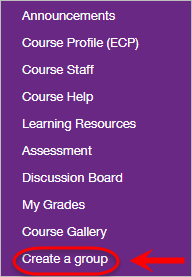
- Click on the Create Group button.
Group information
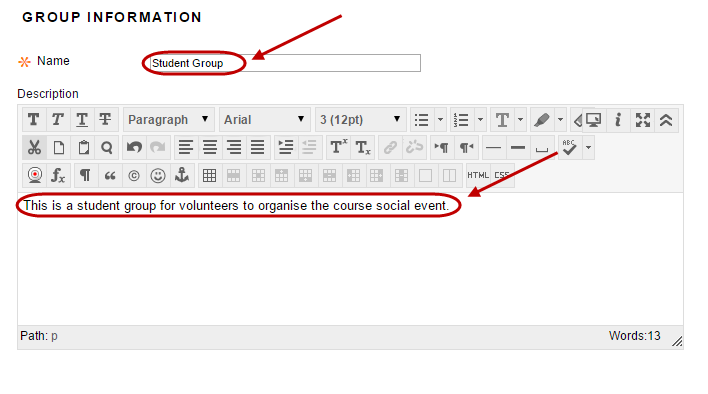
- Enter a name for the group in the Name textbox.
- Enter a description of the purpose of the group and instructions for students in the Description textbox.
Sign up options
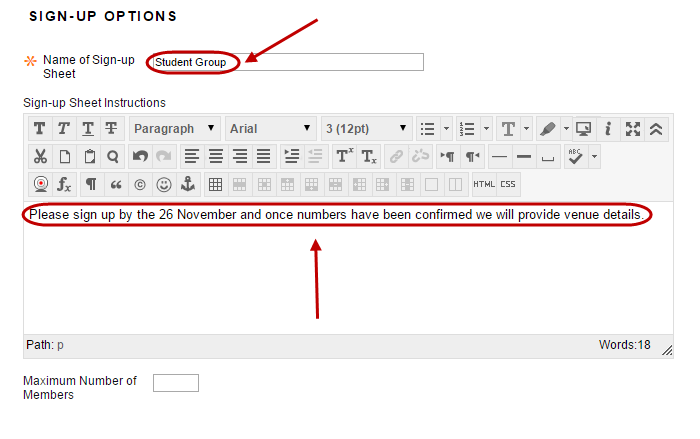
- Enter a name in the Name of Sign-up Sheet textbox.
- Enter a description of the purpose of the group and instructions for other students in the Sign-up Sheet Instructions textbox.
Group options
- Option to check the Create smart view for this group checkbox to provide a link for the group.
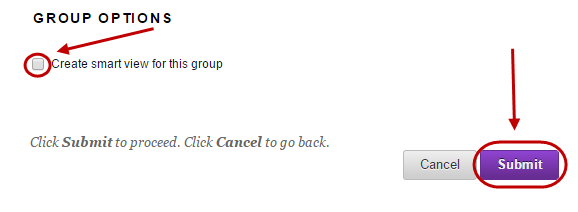
- Click on the Submit button.
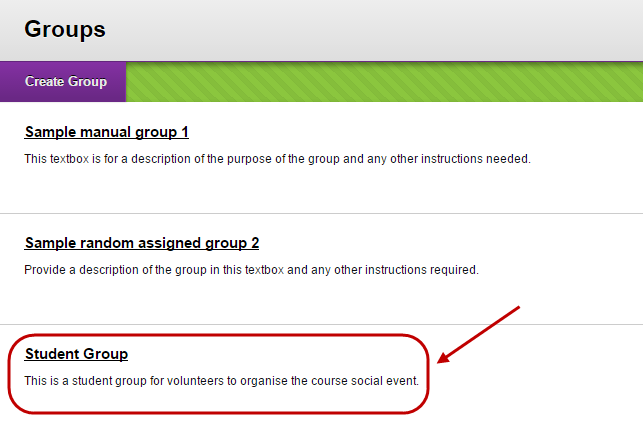
- The group link will now be displayed on the group’s page.
Note: The person who created the group is automatically a member of the group.
Editing group
- Click on the arrow of the required group set.
- Select Edit from the dropdown list.
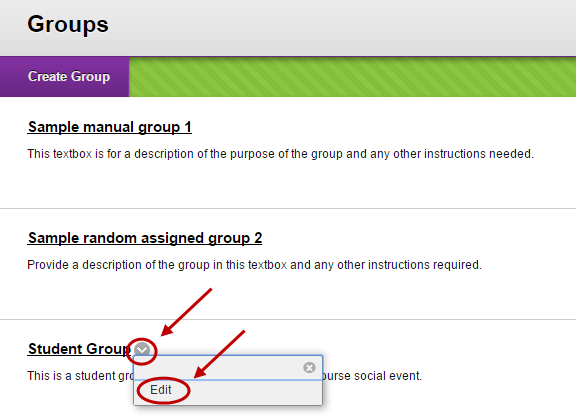
- Change the required properties.
- Click the Submit button.

