
Attendance in Ed Discussion (Ultra)
Attendance is a new functionality in Ed Discussion that allows course staff to track student attendance. This option is available to Course Coordinators through the Ed Discussion settings.
Note: You DO NOT need to use Ed Discussion as your course discussion board to use the Attendance functionality.
To use Attendance in your course, follow these steps:
- Link Ed Discussion to your Learn.UQ course
- Sync student enrolments.
Once these steps are completed, you can begin recording and managing student attendance through Ed Discussion:
- Create attendance sessions for the whole semester
- Track student attendance
- Sync attendance data to Learn.UQ course.
Enable Attendance in your course Ed Discussion
Link Ed Discussion to your Learn.UQ course
- Log in to your Learn.UQ.
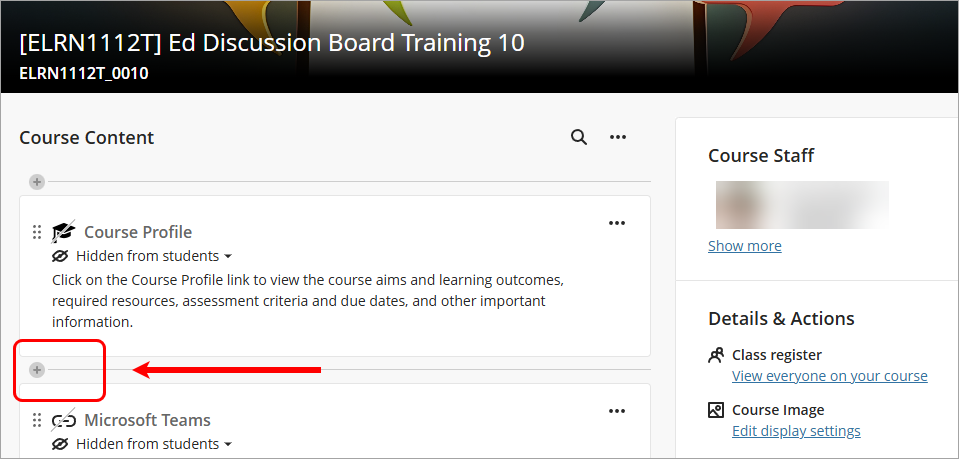
- Click on the plus button on the Course Content page. Note: It is recommended that Ed Discussion should be added underneath the Course Profile.
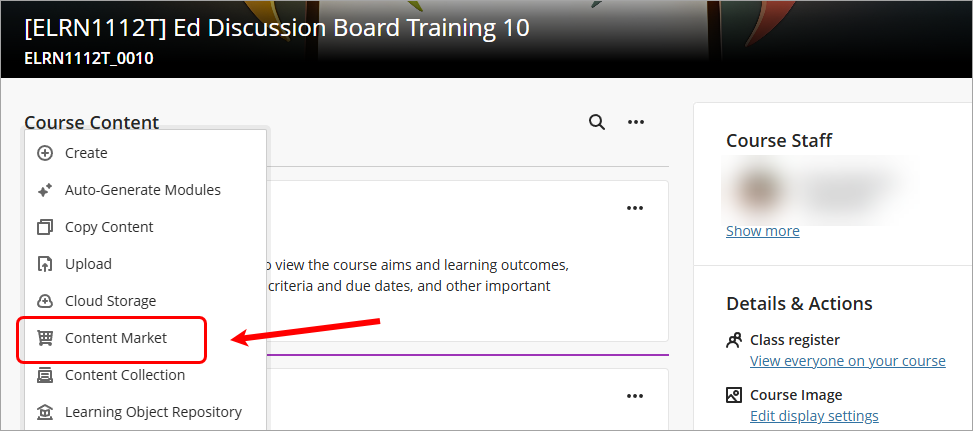
- Select the Content market from the list.
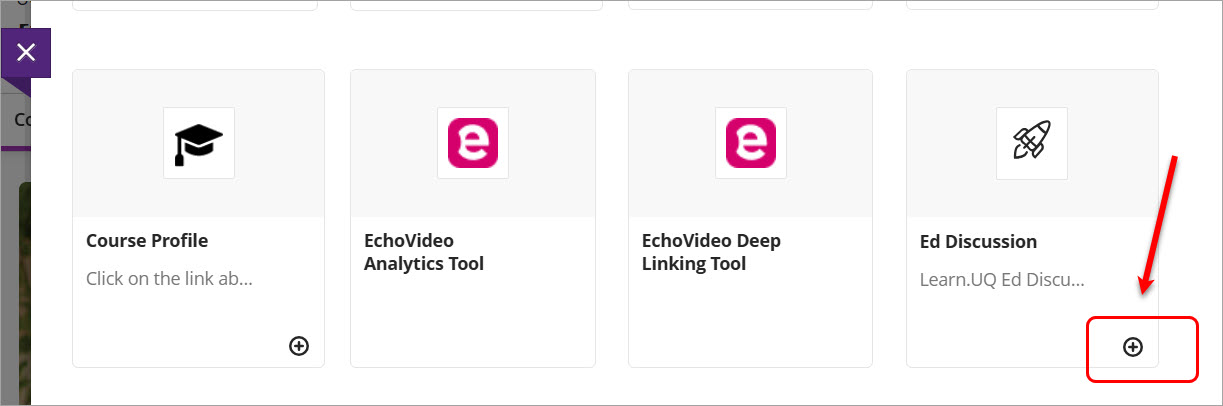
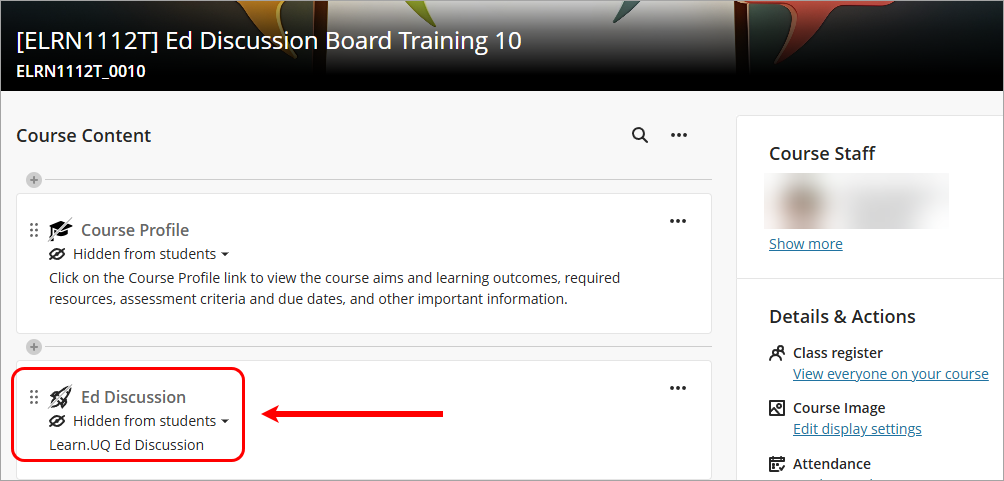
- Locate the Ed Discussion tool. Click on the plus button to add Ed Discussion to your course.
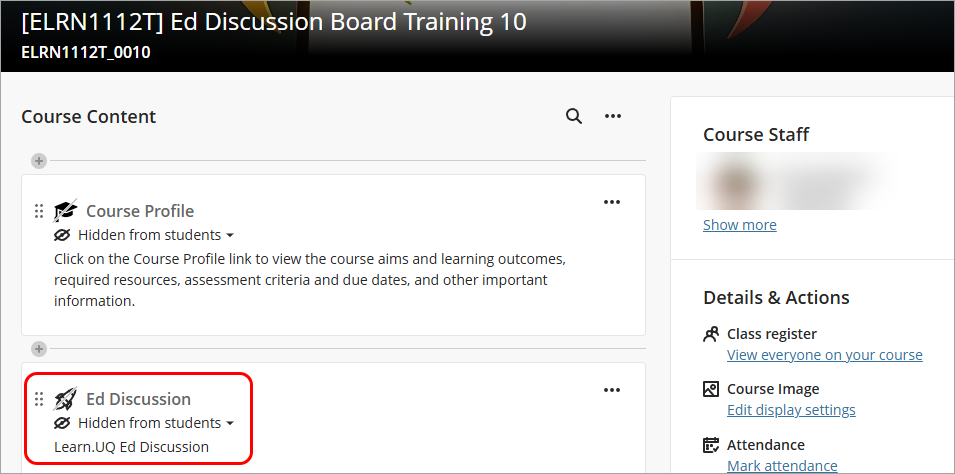
- The Ed Discussion link will be displayed on your Course Content page. Please keep the link hidden from students if you do not use Ed Discussion as the discussion board in your course.
Sync student enrolments
- From your Learn.UQ course, click on the Ed Discussion link.
- The Ed Discussion platform will be displayed in a new tab on your browser.
- The Attendance functionality is available in your course Ed Discussion.
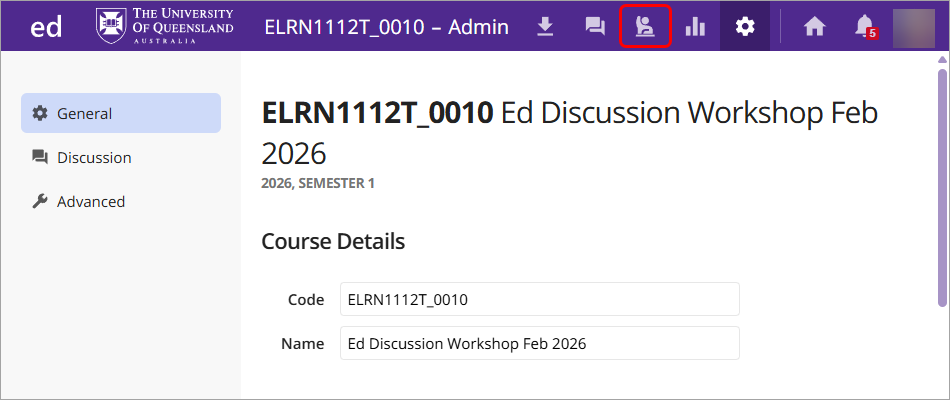
- Click on the cog (settings) button.
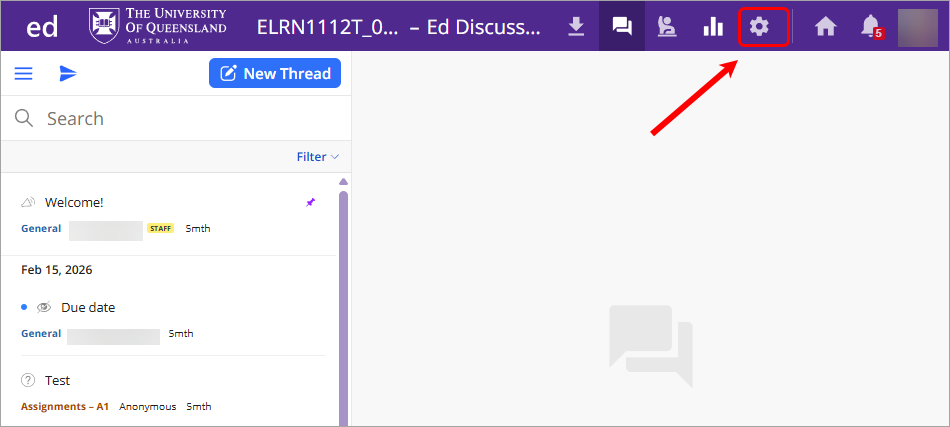
- Scroll down the page. You will see the course list.
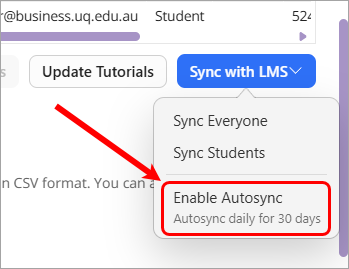
- Click on the Sync with LMS button.
- Select the option Enable Autosync. Note: You can use any of the sync options.
Track student attendance
Create attendance sessions
- Access your Learn.UQ course.
- Click on the Ed Discussion link.
- Click on the Attendance option from the top navigation.
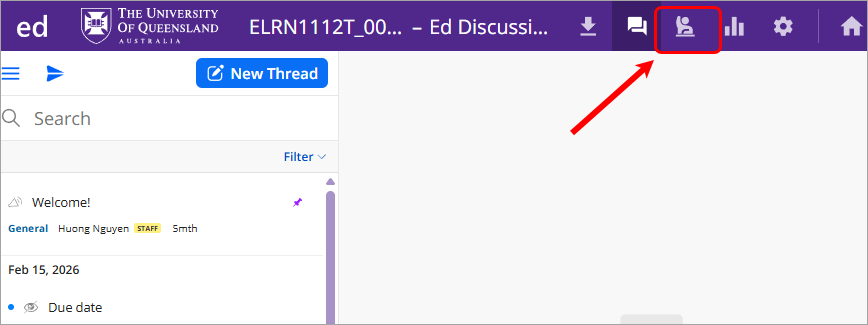
- Click on the Create Session button.
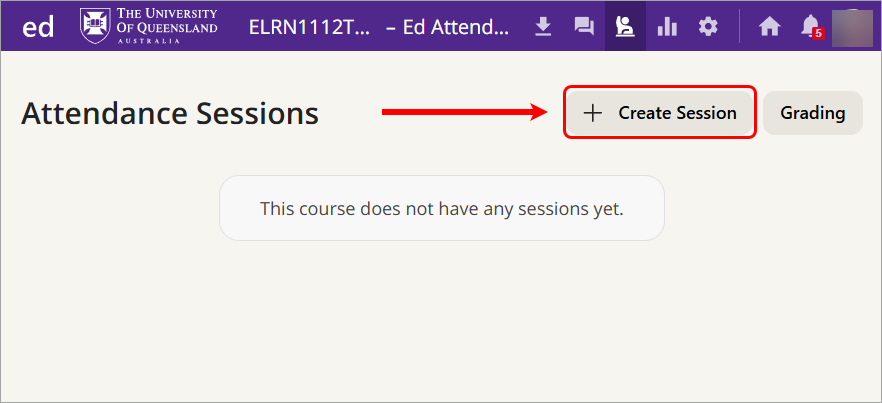
- Enter a relevant title, such as Week 1, into the text box. Note: You DO NOT need to create separate sessions for different tutorials to track all tutorials' attendance.
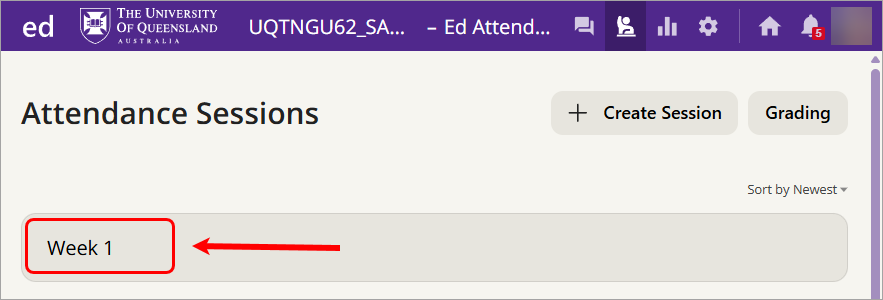
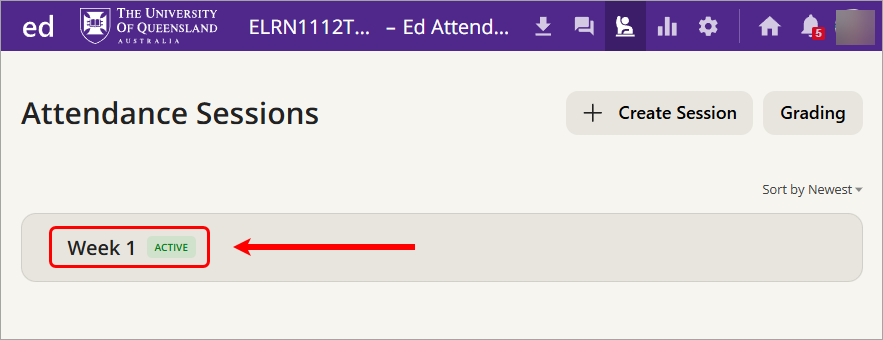
- Click outside of the box and the first session is created. Note: The Active tag signifies that you can start tracking student attendance in the session.
- Click on the session's title to check the settings.
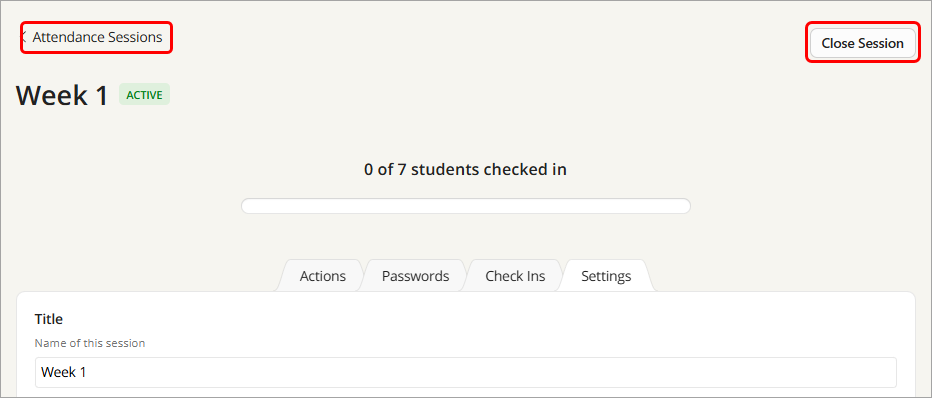
- At the top of the page:
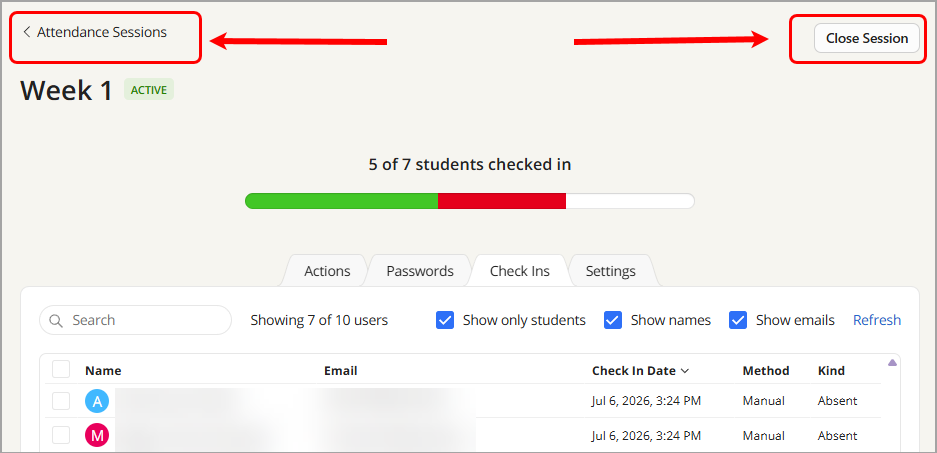
- Attendance sessions: Click this option to return to the list of all attendance sessions.
- Close Session means the session is live and can be used to track students' attendance. Once attendance has been completed, click Close Session to end the session and prevent any further attendance submissions.
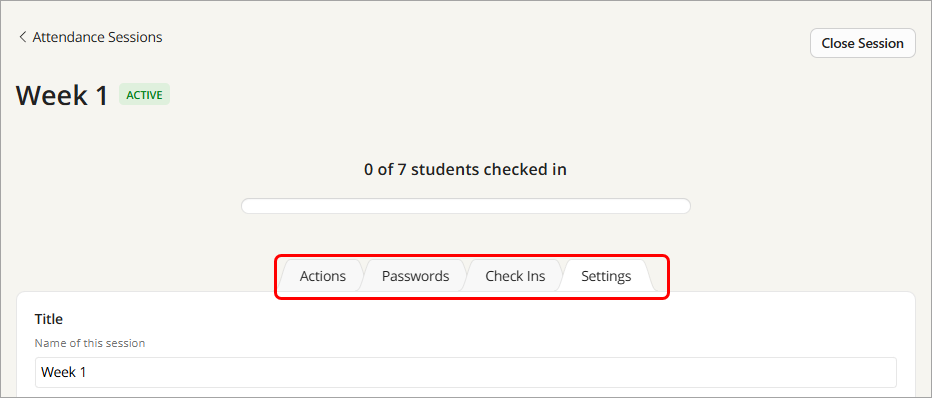
- On the same page, you also have four options: Actions, Passwords, Check Ins, and Settings.
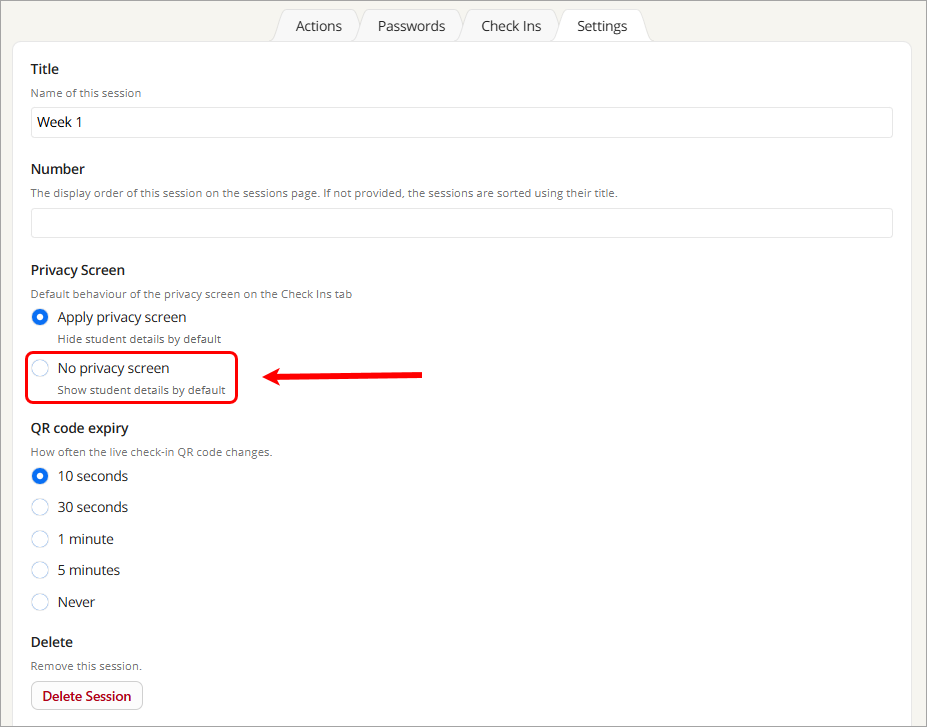
- Click on the Settings button.
- Session name: This field is automatically populated with the title entered in the previous step.
- Privacy screen: The recommended option is No privacy screen, as this allows you to view students' names during attendance tracking. If you forgot to turn on this setting, you can click on the button to view students' names when checking students' attendance.
- QR code expiry: The default setting is 10 seconds, and it is recommended that you leave this unchanged. This setting refreshes the QR code every 10 seconds, helping to prevent students from capturing the code and sharing it with classmates who are not physically present in the class.
- Delete: Select the Delete button to remove a session.
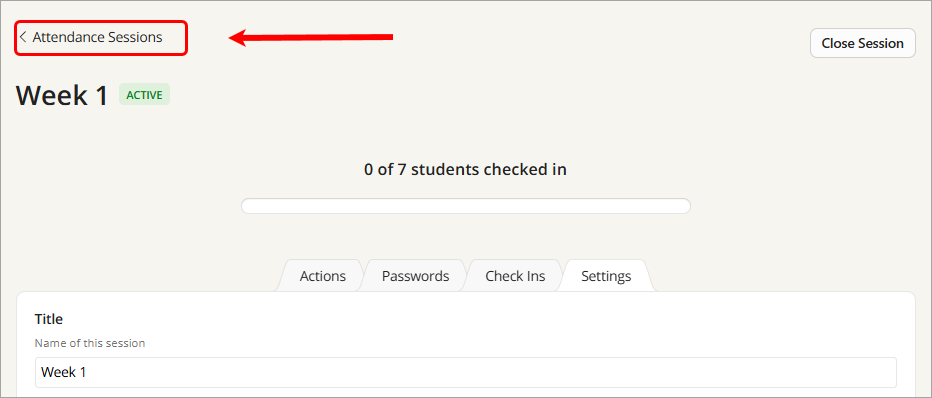
- Scroll up the page and click on the back to all Attendance sessions option.
- It is recommended that you create all required sessions for the semester.
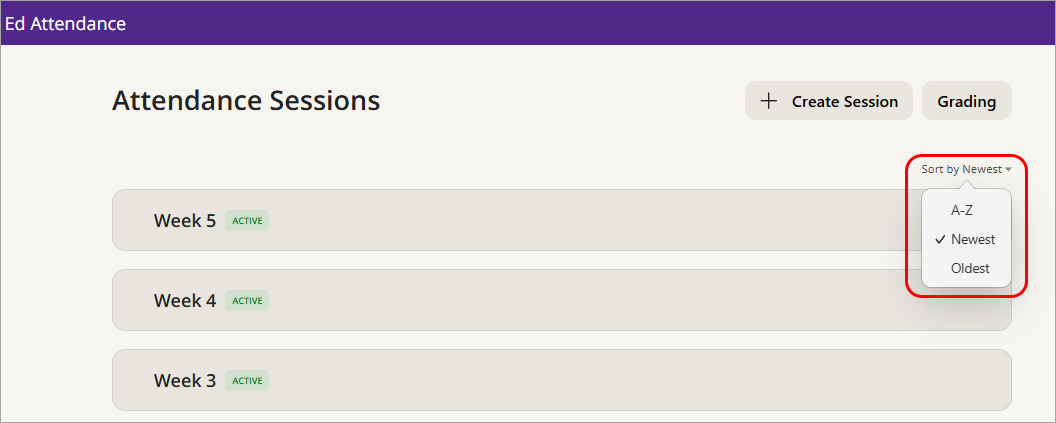
- All sessions are sorted from the newest session by default. You have the option to sort them by title or by the oldest session.
Track student attendance
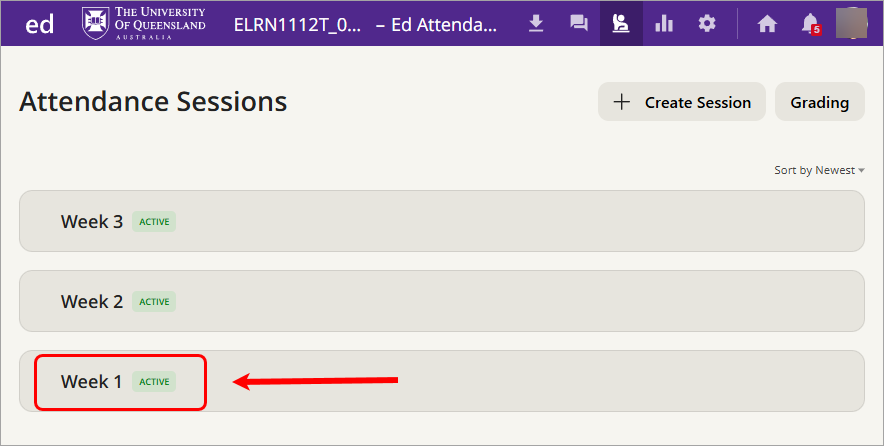
- Click on a relevant session you want to track student attendance.
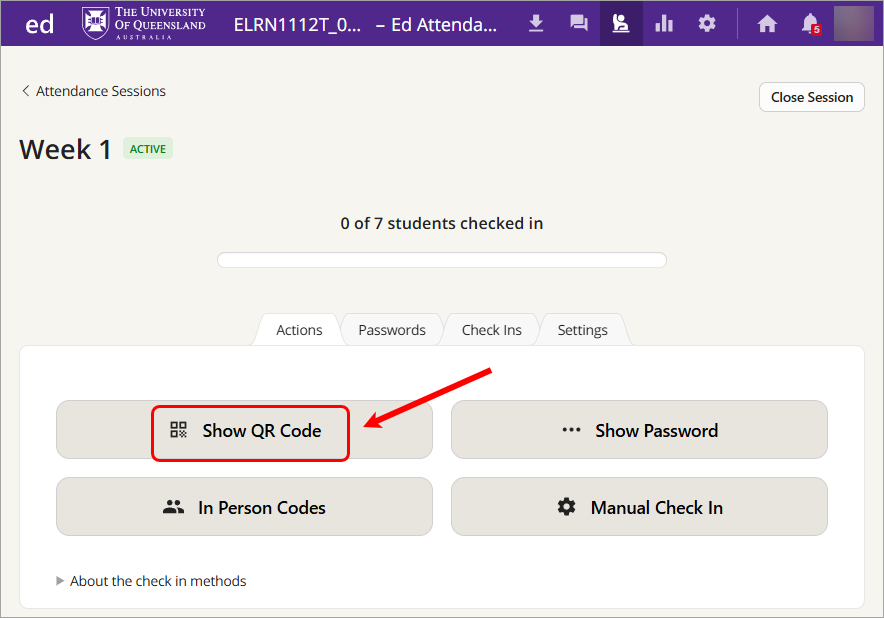
- Select the Show QR code option. Note: You have the option to click on the Passwords
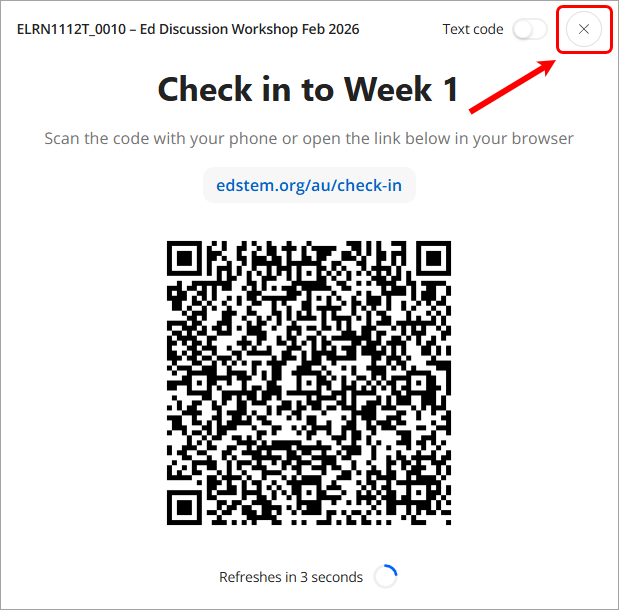
- The QR code will be displayed for students to scan with their phone. The QR code is refreshed every 10 seconds.
- When the cohort has completed their check-in, click on the cross button to close the QR code. Note: the session is still open at this point.
- Select the Check Ins option to view students' attendance.
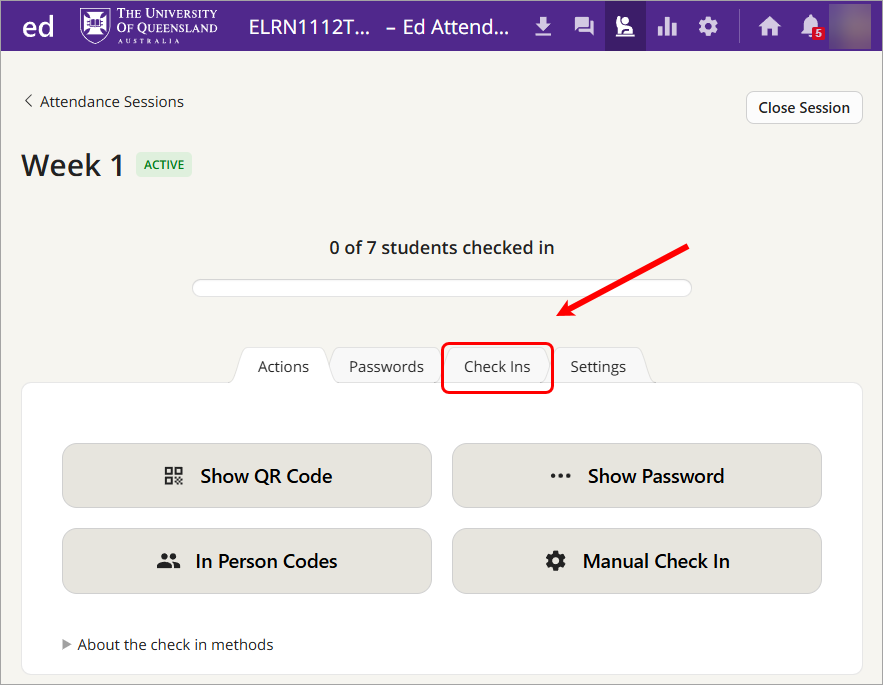
- The student list will be displayed with attendance status, e.g. Absent or Present. Note: Please click on the options to Show names and/or Show emails if required.
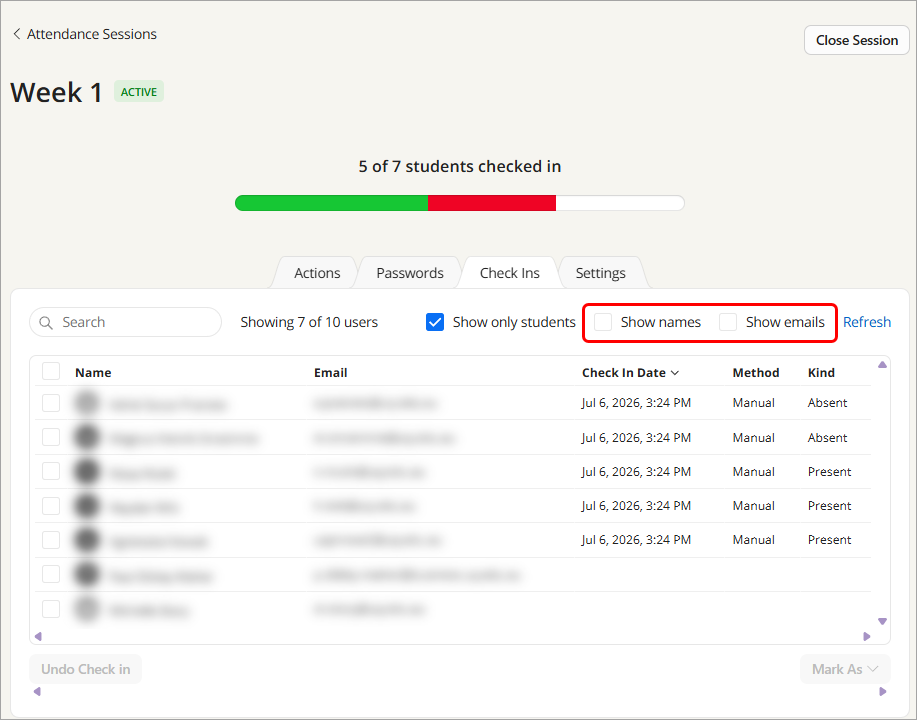
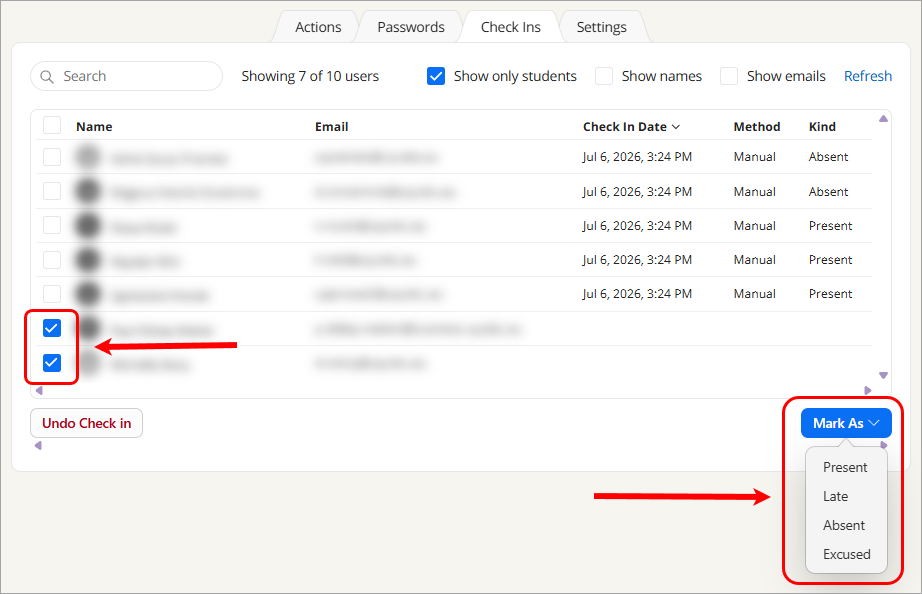
- Optionally, if you need to manually mark attendance for some students (because they forgot their phone or arrived late), select the box in front of the student's name.
- Select the relevant attendance option. Note: The option 'Excused' means students did not show up but sent a reason to the teacher (more like in schools rather than the higher education context).
- You can end the session if you won't need it for the next tutorial groups in the week.
- Click on the Attendance Sessions to go back to the sessions list.
Sync attendance data to Learn.UQ course
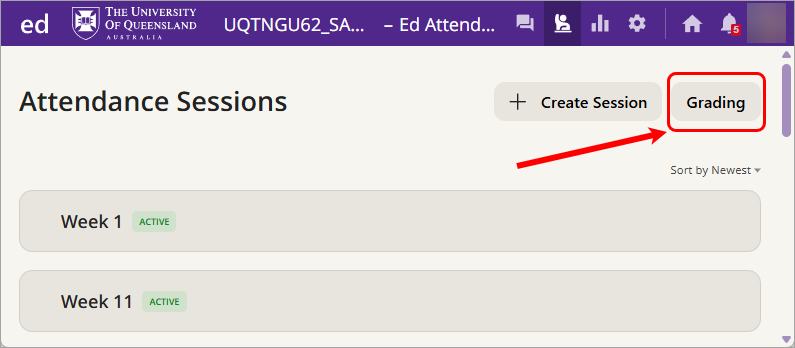
- Click on the Grading button.
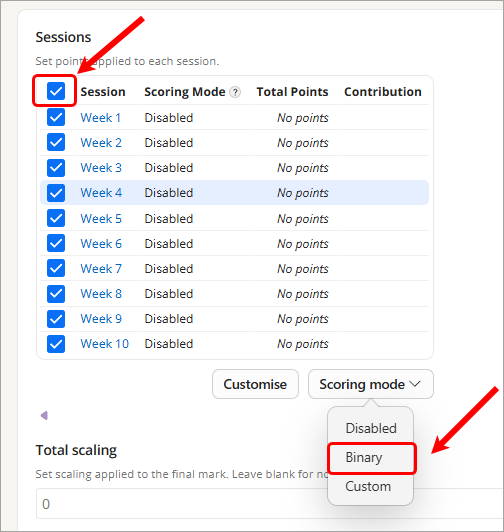
- Select the top/all Sections checkbox.
- Click on the Scoring mode button.
- Select the Binary option. The binary option gives the Present status mark 1 and Absent mark 0.
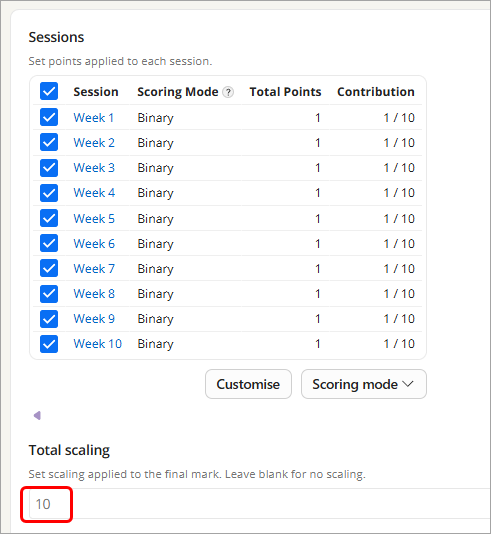
- The total marks will be auto-populated, e.g, 10 marks for 10 sessions. That will help you keep track of students' attendance throughout the semester.
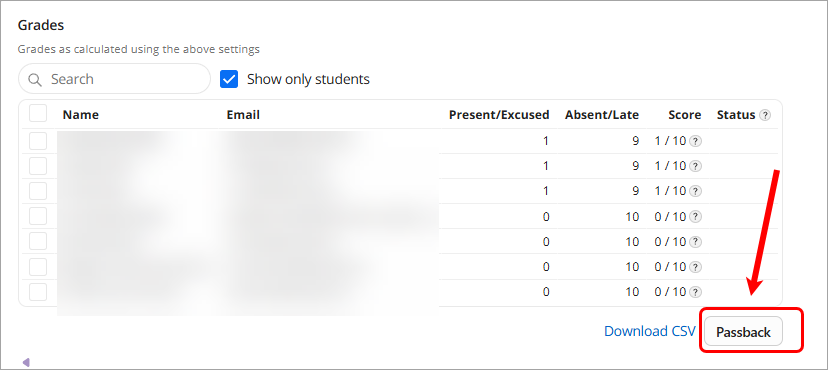
- Once the attendance is completed for the session, click on the Passback button.
- Student attendance data will be populated to a column called [ed] Attendance in your Learn.UQ course's Gradebook. The total mark is set to 10 as per the set up in Step 5.
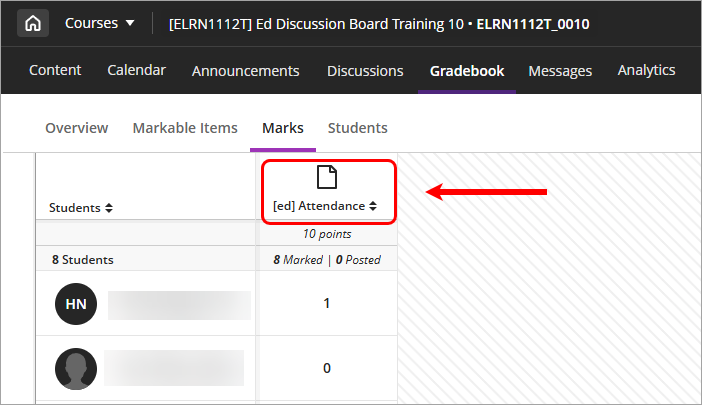
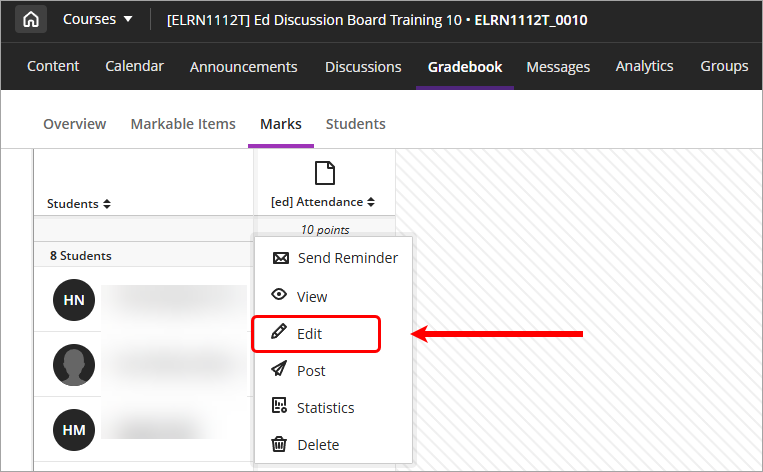
- Click on the [ed] Attendance header and select the Edit option.
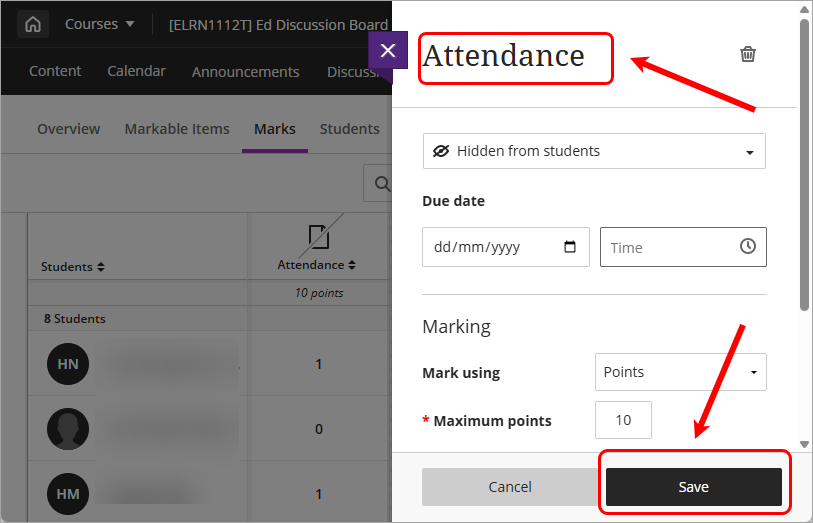
- Remove [ed] from the title and keep all other details/settings.
- Click on the Save button.
You can Pushback the attendance data every week to see the data in this column updated.
- Activate Ed Discussion for your Learn.UQ course (Ultra)
- Attendance in Ed Discussion (Ultra)
- Create discussions (Ultra)
- Ed Discussion Chat and Channels (Ultra)
- Grade discussions (Ultra)
- Group discussions (Ultra)
- Icebreakers with Discussion Boards (Ultra)
- Link Ed Discussion Board to your Learn.UQ course (Ultra)
- Manage discussions (Ultra)
- Online Tutorial - Discussion (Ultra)
- Online Tutorial - Worksheet (Ultra)
- Respond to Discussions (Ultra)
- Set up Ed Discussion Board (Ultra)