Embed a Presentation (Original)
SlideShare presentations can be embedded into your course without the need to copy and paste code. You can either insert the presentation directly into a content area or insert it anywhere there is a Text Editor (Announcements, Discussion Boards, Blogs, Journals, Wikis, Assignments and Tests).
Note: To use the SlideShare mashup tool on campus you must be logged into the UQ Internet Quota System. i.e. Enter any external website address into your browser, enter your user name and password and click continue.
Access SlideShare
Content Area
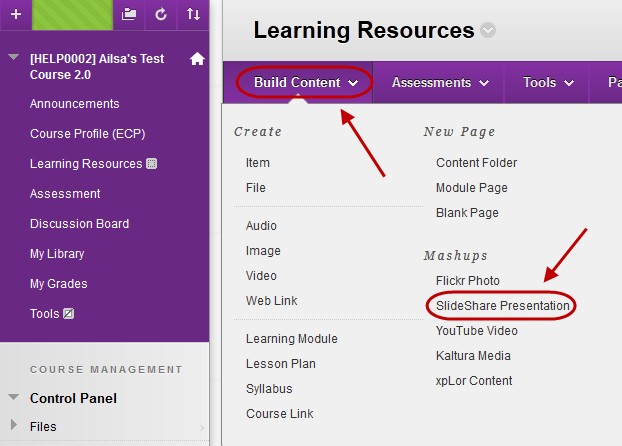 | Text Editor
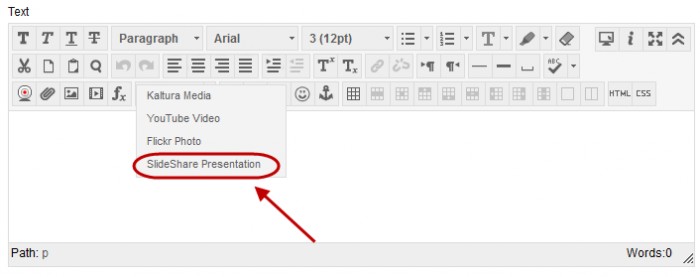
|
Search for a presentation
- Enter the keywords you want to search for into the Search textbox.
- Click the Go button.

- A page/s of search results will be displayed.
- Click the appropriate Preview button to view a presentation.
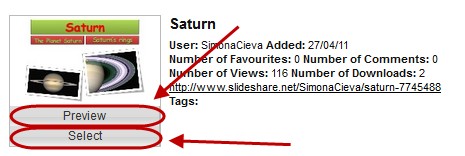
- Close the preview and click on the Select button to embed thepresentation into your content area.
Add YouTube Content to Course
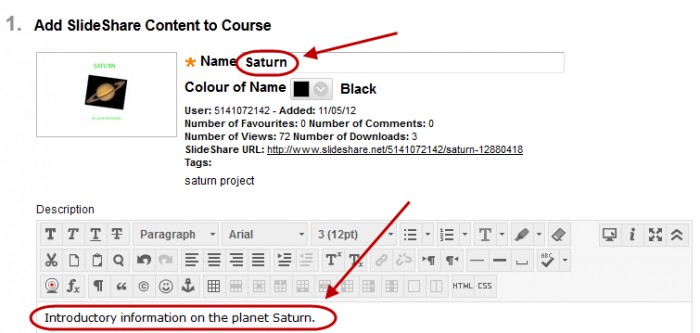
Edit the title in the Name textbox if needed.
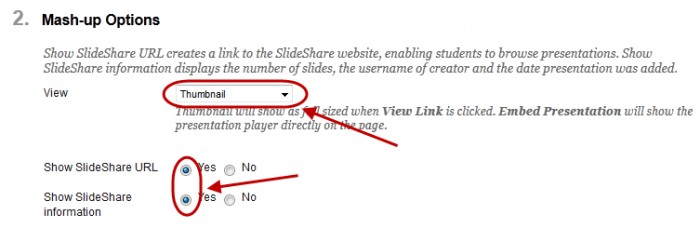
Mash-up Options
- Select a view from the View drop down menu.
- Thumbnail – click on a small image to open the video.
- Text link with player – click on this link to open the video.
- Embed presentation – a full size presentation link is inserted into the page.
Note: It is recommended that you use the Thumbnail option.
- Optionally, select the Yes radio button the setting Show SlideShare URL.
- Select the Yes radio button selected for the setting Show SlideShare information.
Tip: Best practice is to include as much information as possible about video.
Attachments (Content Area only)
- Click on the Browse My Computer button to upload a file from your computer.OR
- Click on the Browse Course button to link to a file you have previously uploaded to the course.
Tip: This option could be used to link a set of tutorial questions that were based on the presentation.
Options
- Optionally, if you do not want students to view the presentation yet, select the No Permit Users to View this Content radio button.
- Optionally, if you want to know how many times the presentation is viewed, select the Track Number of Views radio button.
- Optionally, set Date and Time Restrictions.
- Click on the Submit button.
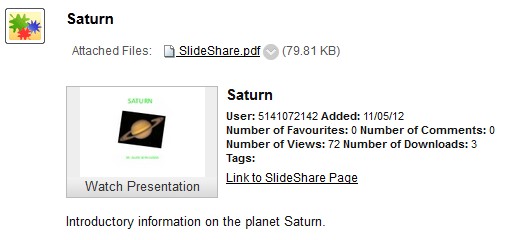
- The presentation will be displayed in the content area as shown:
Note: The presentations are external web content, so your students will need to login to the UO quota management system to view the video on campus