Insert a Content Area Image (Original)
Video Guide
Insert a Content Menu Image (YouTube, 1m 29s)
Insert a Content Area Image
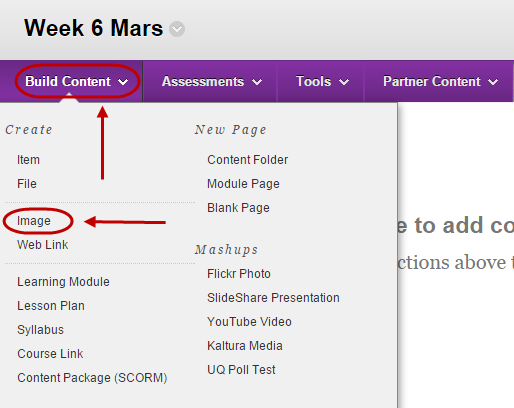
- Click on the Build Content button.
- Select Image from the drop down menu.
Select Image File
- Click on the Browse My Computer and browse to and open the require file OR
- Click on the Browse Course and select the radio button of the required file. Click the Submit button OR
- Click on the Browse Mashups and search for and select a FlickR photo.
- Enter a title in the Name textbox.
- Optionally, select the font colour for the title from the Colour of Name drop down colour picker.
- Enter a description of the image in Alt Text textbox.
- Optionally, enter a detailed description of the image in the Long Description textbox.
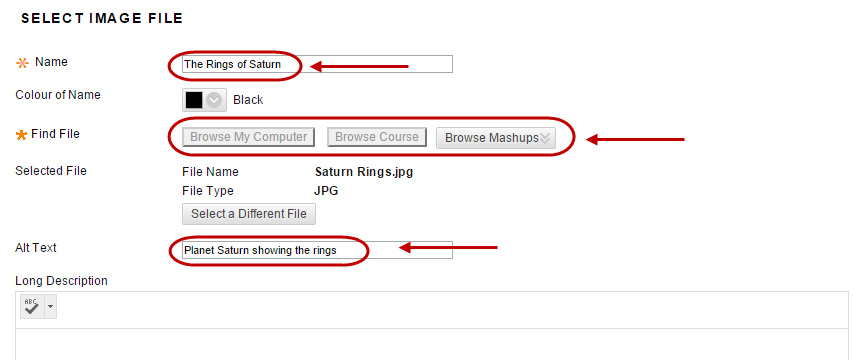
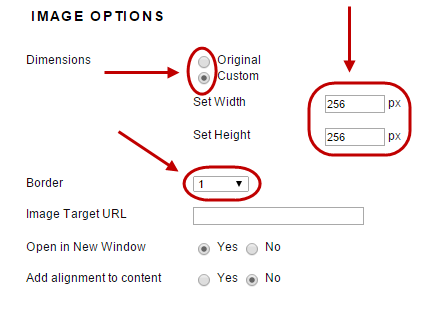
Image Options
- If the image is not to be displayed in it’s original dimensions, select the Custom radio button.
- Enter the required dimension in the Set Width and Set Height textboxes (keeping the original proportions).
Tip: Save the image with the required dimensions (use a graphic program) before uploading it to Learn.UQ, as large files will slow the page when downloading.
- Select the required border width from the Border drop down list.
- If the image is to create a link to a web address, enter the address in the Image Target URL.
Tip: Links can be added to Library catalogue items (such as videos). Every item in the Library catalogue has a stable URL (Record ID) that can be used as a link in Learn.UQ (Blackboard). Refer to the UQ Library catalogue – streaming video guide.
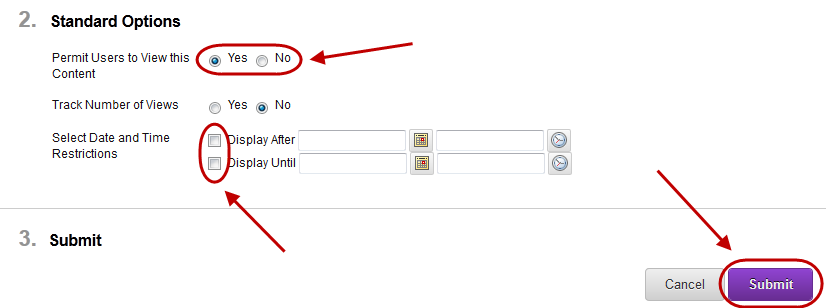
Standard Options and Submit
- Optionally, if you do not want students to view the file yet, select the No Permit Users to View this Content radio button.
- Optionally, if you want to know how many times the file is viewed, select the Track Number of Views radio button.
- Optionally, set Date and Time Restrictions: i.e. The course content could be organised into weekly learning modules that are display progressive over the semester at the relevant time.
- If required, select the Display After checkbox and enter the date using the Date Selection Calendar and enter the time using the Time Selection Menu.
- If required, select the Display Until checkbox and enter the date using the Date Selection Calendar and enter the time using the Time Selection Menu.
- Click the Submit button.